|
|
|
|
| Missing In Action (MIA) | Prisoners Of War (POW) | Unexploded Ordnance (UXO) |
| Chronology | Locations | Aircraft | Ships | Submit Info | How You Can Help | Donate |
|
| IJN Type A Kō-hyōteki kō-gata 46 Tons (surfaced) 47 Tons (submerged) 78.5' x 6' x 10.2' 2 x Type 97 torpedo 140kg scuttling charge  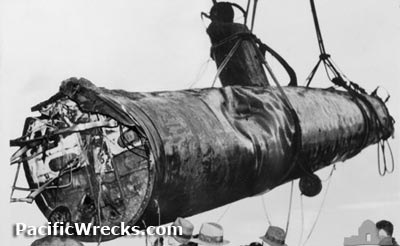 AWM June 1, 1942 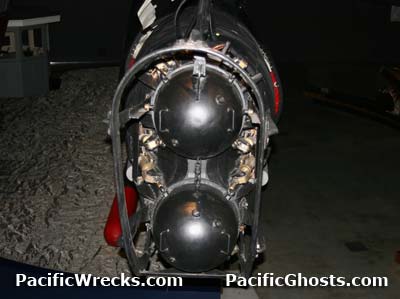 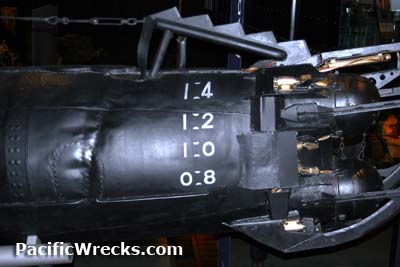 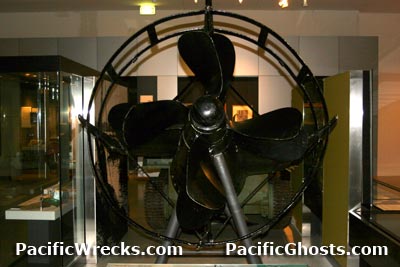 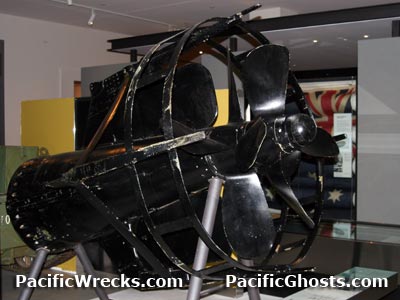 Justin Taylan 2006 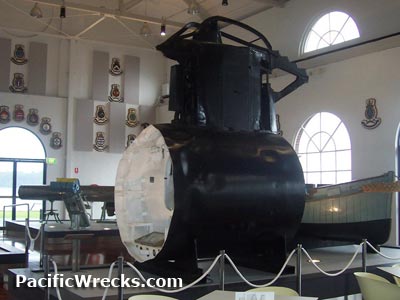 Dave Arnold 2006 |
Captain Lt. Matsuo Keiu (died by suicide) Navigator Chief Petty Officer Masao Tsuzuku (died by suicide) Sunk June 1, 1942 7:30am Mission History On May 31, 1942 between 5:21pm to 5:40pm this midget submarine was launched by Japanese submarine I-22. This midget submarine along with HA-24 (M24) and HA-14 (M27) were on a mission to penetrate Sydney Harbor and torpedo enemy vessels. At 11:00pm, this submarine attempted to enter Sydney Harbor but was detected and fired on by HMAS Yandra. The submarine sustained some damage and retreated for four hours. Sinking History On June 1, 1942 at 3:00am, this submarine again attempted to enter Sydney Harbor and was spotted by USS Chicago CA-29. In Neutral Bay, fired on by British merchant ship Kanimbla. This second attempted entry gave the impression that four submarines were attacking. At 5:00am spotted in Taylor's Bay by HMAS Sea Mist and forced the submarine to dive to the bottom and dropped two depth charges that damaged their vessel and the submarine. Next, HMAS Steady Hour dropped 17 depth charges atop. At 7:30am, the crew attempted to detonate the scuttling charge but sea water flooding into the hull disabled the explosives. Unable to escape because the conning tower hatch was stuck, the crew shot each other to commit jiketsu (honorable suicide). Shipwreck On June 2, 1942 Royal Australian Navy (RAN) divers dove on the submarine and found the engine was still running and propellers slowly turning. On June 4, 1942 the submarine was raised from Sydney Harbor and lifted using a crane and placed ashore atop timbers. The midget submarine was intact from the bow to the rear section, with a dent on the rear port side from the explosion of a depth charge. Recovery of Remains After the submarine was recovered, the remains of both crew members were found inside with self inflicted gunshot wounds. Their remains were cremated and given a military funeral with full honors in Australia. Afterwards, their ashes were transfered to Japanese authorities and later returned to Japan. Display Afterwards, disassembled into two pieces. By November 1942, the midget submarine pieces loaded aboard trailers and displayed at Exhibition Gardens in Sydney. Afterwards, the submarine toured Australia until the end of the Pacific War to raise money for the war widows fund. Bow Section In 1975, the Australian War Memorial (AWM) assembled a complete Type A Midget Submarine (composite) using the bow section of HA-21 Type A Midget Submarine (M22) combined with the center and stern section of HA-14 Type A Midget Submarine (M27) to create an externally complete submarine for display purposes. Since 2001, the complete Type A Midget Submarine (composite) is displayed in ANZAC Hall at Australian War Memorial (AWM). Displayed below the submarine are artifacts related to the May 31-June 1, 1942 midget submarine attack on Sydney Harbor. The display includes the conning tower hatch from either M22 or M27, Type 97 torpedo and the helmet that belonged to Lt. Kenshi Chuma commander of M27. Center Section In 1978, the restored center section of M22 was returned to the Royal Australian Navy (RAN) and restored. During October 2005, the center section was put on display at Royal Australian Navy Heritage Centre (RAN Heritage Centre). Inside the center section are pebbles from the hometown of Masao Tsuzuku, donated by his sister are displayed inside the center section. References Previously, Lt. Matsuo Keiu was aboard the I-22 on December 7, 1941 AWM Lemonade bottle recovered from Japanese midget submarine, Sydney Harbour (REL/00635) RAN Japanese Midget Submarine Attack on Sydney Harbour by John Perryman Thanks to CMDR Shane Moore / RAN Heritage Centre for center section display information Contribute
Information Last Updated
|
Photo Archive Map May 31-June 1, 1942 |
| Discussion Forum | Daily Updates | Reviews | Museums | Interviews & Oral Histories |
|